Pool Boy Powered Solar Blanket Reel

This post is about my “Pool Boy Installation Experience” based on what I went through to get our Pool Boy Powered Solar Blanket Reel setup and working correctly.

So what is a “Pool Boy Powered Solar Blanket Reel“?  It is a device that is used to deploy and retract a solar pool cover. For us, it replaced a manual reel, which was a pain to use.

Pool Boy Installation Experience
Cover Retracting

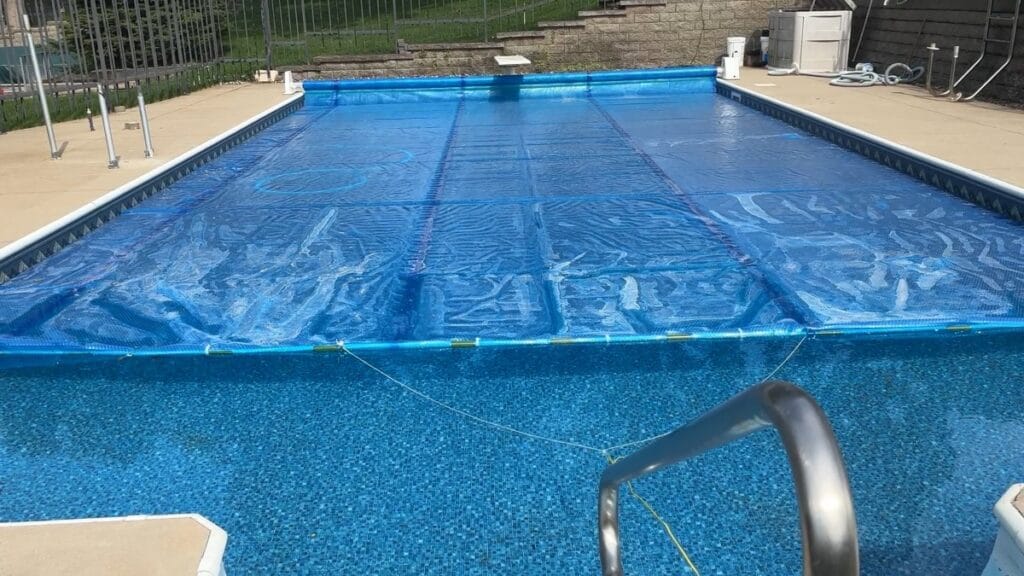
We use a solar cover on the pool to retain heat, minimize evaporation and on sunny days, add heat to the pool. Covers are kind of like heavy duty bubble wrap.

Shipping Confusion

We ordered the Pool Boy 1A from Amazon. After a couple days, we received a single long box that contained the reel kit, via Fedex. Amazon said it was delivered but it was obvious from the size of the box that it was not the entire system. After a couple of phone calls we were able to determine that there was a second box being delivered via UPS.

That was an unnecessary hassle. The seller could have sent us an email that there would be two boxes, sent separately. Considering the price and the restrictive return policy the mix-up caused stress that we did not need.

Setup

My first impression of the instructions was that they were pretty good and it should not take long to setup. However, the reality was that the instructions were weak in spots, leading to more time than expected.

The installation steps follow with comments about what worked and did not work.

1) Position the Stands

The instructions describe where to place the stands and how to adjust the height. What was missing was any commentary about how to determine the correct height. The stands were set at the highest setting. Lacking any guidance, I left the stands as they came. Turns out that was a costly mistake.

2) Tube Assembly - Twist Locking Tubes

This step had the most complete instructions and they were very good. I was able to assemble the reel quickly and easily without any confusion. Everything worked as expected. The last step in this section was to put the reel onto the stands which was not difficult. But, with the reel in place it was obvious that I needed to adjust the stand height down, a lot. 

It turns out that adjusting the height, with the reel in place is very difficult. Removing the reel is way harder than putting it on, so I left it in place. What would have taken 10 minutes if done when I positioned the stands took close to an hour with the reel in place. It did not help that I was kneeling on a knee that I had replaced a few months ago.

3) Electrical Connections

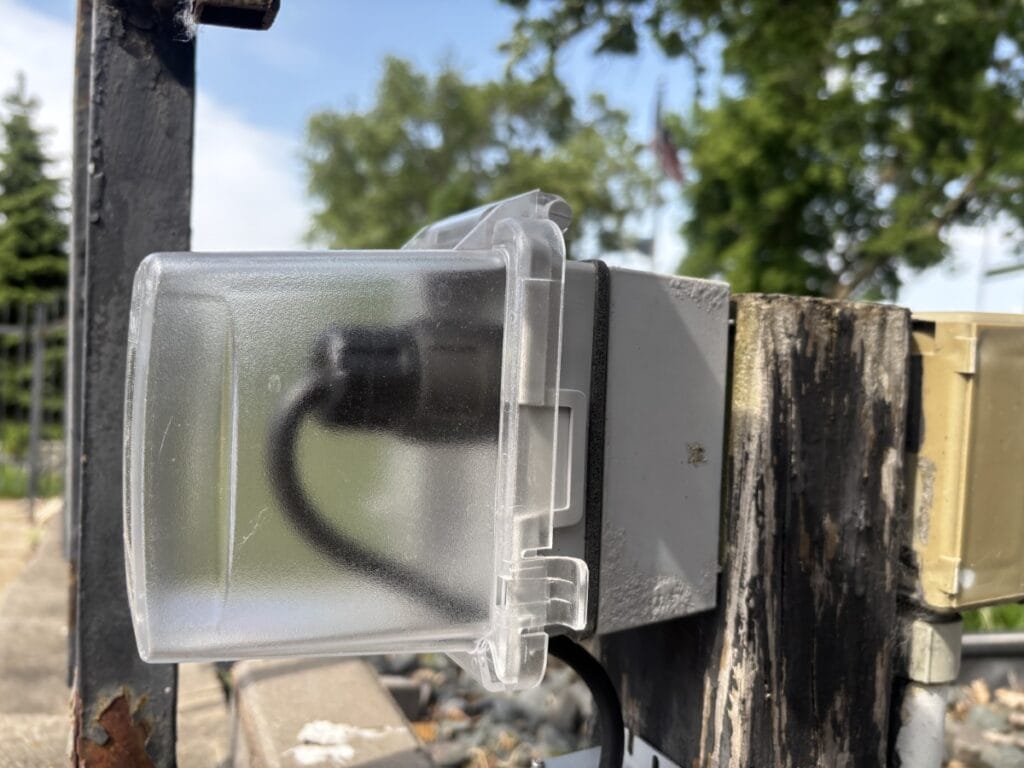
What should have been easy, was not. The plug that you plug into the pool side outlet was about 3″ long. No way it would fit under a normal weather proof outlet cover. So that meant a trip to Menards and then swapping in the new outlet cover. On a positive note, in the process I found a loose wire in the box that was causing a downstream electrical problem. With the new cover in place, I was able to plug in the cable and mount the transformer.

Pool Boy Installation Experience
Plug in outdoor outlet cover

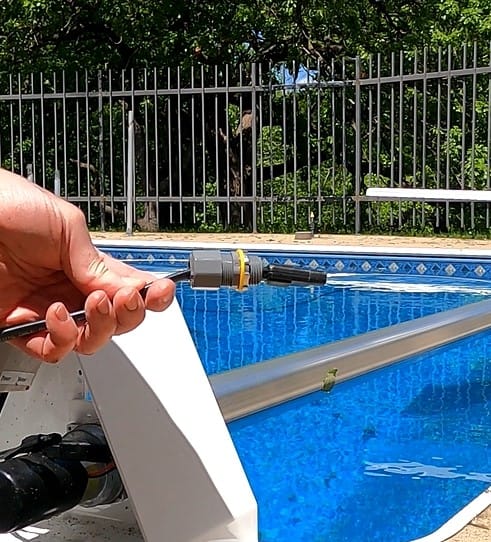
On the other end, you have to pass the end of the cable through the side of the stand. There is a connection device called a cord grip. Out of the box, it will not fit through the hole. The “Cord Grip” pictured in the instructions looks nothing like what is used. It took me a couple minutes to figure out to unscrew the nut, remove it and the orange washer and then everything worked fine. The instructions should have an accurate picture and provide some installation details.

CordGrip
Cord Grip Assembly

Tip: The model I bought comes with a power cord that is about 40 feet long. I only need about 10-12 feet. My first thought was to cut and splice the cable. Then I realized that there was plenty of room in the motor stand for the excess cable. So I pulled the excess into stand, zip tied it into a neat coil and closed up the stand. Problem solved!

4) Test Run

Prior to testing, I screwed the antenna onto the drive stand. Then, with everything plugged in, I did a quick test. The remote worked and the motor ran in both directions based on which remote button was used.

5) Install Stand Covers

This should have been a trivial step, except it was not. The covers were plastic and did not exactly fit the stands. To make it worse, they provided plastic screws that should thread into the stands but did not.

The combination of poor fitting covers and screws that would not thread made for more wasted time.  To make the covers work I enlarged the bottom holes on the covers slightly. Then I took a file and tapered the ends of the plastic screws. With those modifications I was able to install the covers quickly.

6) Attach the Solar Blanket

The steps to install the solar cover were detailed and complete. It was a bit awkward to crawl around on the pool deck and make the connections but they got done. One of the first things the instructions say is to trim the cover. I did not do it at this time. In hindsight I probably should have.

7) Install Tether Kit

This is a generic tether kit. On the surface it should work. In practice, it did not. More about that later.

Trouble Shooting

With everything assembled, I started testing by retracting cover and deploying it. The tests were not without problems.

Uneven Rolling Onto the Reel

The first few times I retracted the cover it would bunch up and end up in a mess. There were actually multiple issues:

The biggest problem was that I had not trimmed the cover. It was too wide for the pool by about 5 inches. Once I trimmed it, the most serious problem went away.

However, after trimming I still had a big wrinkle in the middle of the cover. It was not a trimming issue but turned out to be caused by the Tether. The way that the tether ropes attached actually caused the wrinkle. I replaced the provided tether system with a DIY version and now the cover retracts and deploys without issue.

Motor Stopping and Staring

As we used the system I kept having a problem with the motor stopping and starting. At first I suspected that the remote was too far from the antenna or that the remote battery was weak.

It turns out that the buttons on the remote are extremely sensitive. If you maintain firm pressure on the button it works fine. If you move your finger around at all the motor will stop. Not a big deal, once you know how it works.

Customer Service

Before I figured out that the remote buttons were so sensitive, I tried calling Pool Boy Customer service. The direct number on their web site goes to voice mail without any greeting. By chance, I watched their video on the web site showing the reel in action. Near the end, it lists an 866 number. I called that number and it was answered by a woman. I explained the issue I was having but she was not listening or did not understand. After going back and forth for a few minutes she finally realized that I was already doing everything she could suggest. She said she would talk to an engineer and have them call me. No one has returned my call.

Impressions

Somebody realized there was a need and sort of cobbled together a solution. Many of the parts are generic off the shelf, like the remote control components. With some fine tuning, the product has been working well.

Would this be a good system for someone with minimal experience with tools and problem solving? Not unless they have someone else install it for them and explain how to make it work well.

Would I buy it again? So far, yes. Now that I have it fine tuned it works well. My wife can retract and deploy the cover by herself, without any assistance.

How was my “Pool Boy Installation Experience”? I have had better and worse experiences. With a few minor changes to the instructions and some of the parts the installation would be easy. The company could easily create a YouTube Video showing the install process.